

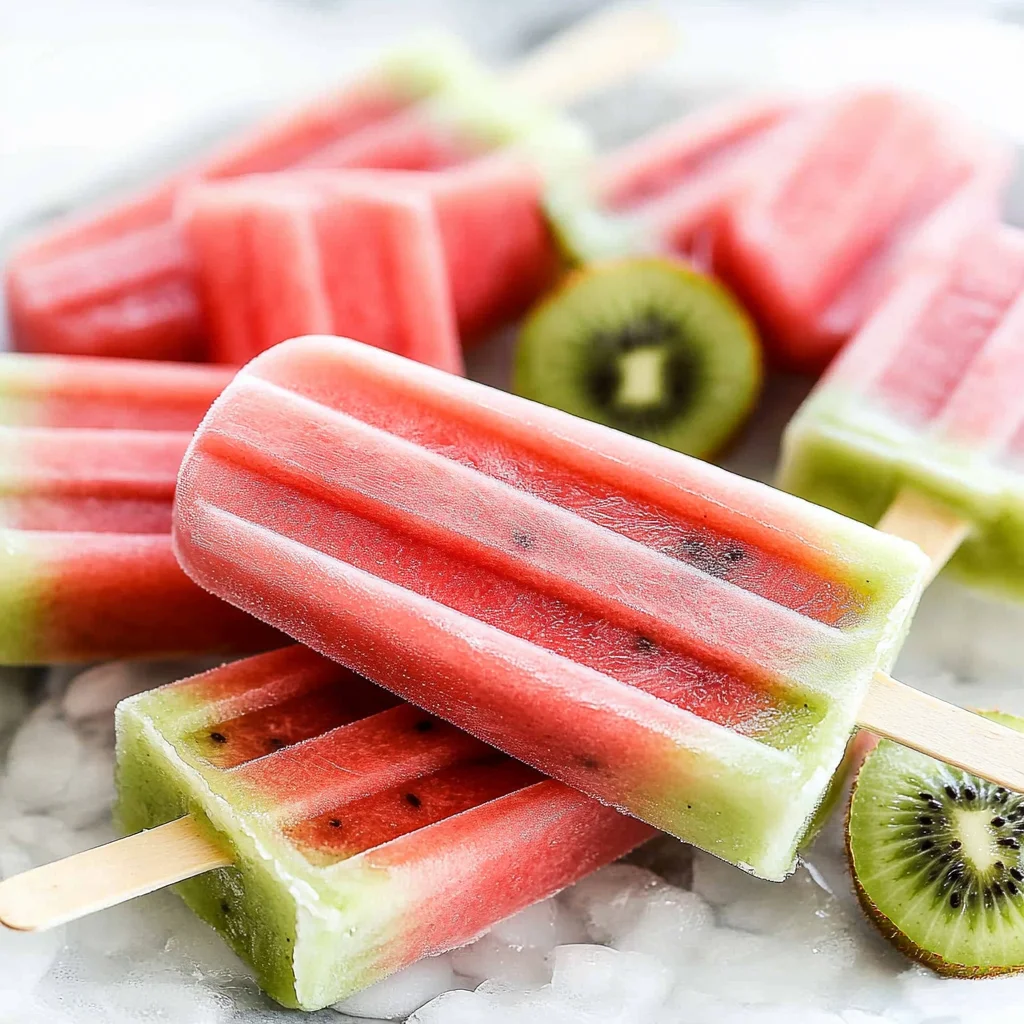
Watermelon Kiwi Popsicles are the perfect way to cool off on a hot summer day. These delightful treats blend the sweet, juicy flavors of watermelon with the tartness of kiwi, creating a refreshing snack that’s both healthy and satisfying. Ideal for kids and adults alike, these popsicles are a fantastic addition to summer gatherings, picnics, or just a fun day at home. With minimal ingredients and simple steps, you’ll be making these vibrant popsicles in no time!
Why You’ll Love This Recipe
- Healthy and Refreshing: Made from fresh fruits, these popsicles are packed with vitamins and hydration.
- Easy to Prepare: With just a few simple steps, you can whip up a batch in under 30 minutes.
- Customizable Flavors: Feel free to experiment with other fruits or add herbs for unique tastes.
- Kid-Friendly Fun: Kids will love helping to make these colorful pops, turning snack time into an enjoyable activity.
- Perfect for Any Occasion: Whether it’s a hot summer day or a birthday party, these popsicles will impress everyone.
Tools and Preparation
Before you start making your Watermelon Kiwi Popsicles, gather your tools. Having everything ready will make the process smooth and easy.
Essential Tools and Equipment
- Food processor or blender
- Popsicle molds
- Measuring cups
- Knife
- Cutting board
Importance of Each Tool
- Food processor or blender: This tool is essential for creating smooth fruit purees quickly and efficiently.
- Popsicle molds: These are necessary to shape your delicious popsicles perfectly.
- Measuring cups: Accurate measurements ensure that your popsicles have the right balance of flavors.
Ingredients
To make Watermelon Kiwi Popsicles, you’ll need the following ingredients:
- 1/2 small seedless watermelon
- 4-5 kiwi fruit
- 1 tsp honey (or more to taste)
For Garnish
- 2 tablespoons fresh parsley, finely chopped
How to Make Watermelon Kiwi Popsicles
Step 1: Prepare the Watermelon Puree
Remove the flesh from the rind of the watermelon and cut it into large chunks. Process in a food processor or blender until smooth. Pulse to get any remaining chunks. You’ll need 2 cups of puree.
Step 2: Fill Molds with Watermelon Juice
Fill each of 10 popsicle molds about 3/4 full with the watermelon juice. Set them in the freezer for 30 minutes to firm up.
Step 3: Make Kiwi Puree
Meanwhile, peel the kiwi and cut it into chunks. Puree in the same manner as before. Add honey to taste—aim for about one cup of puree.
Step 4: Assemble Your Popsicles
Fill each of the popsicle molds to the top with kiwi puree. Insert a stick into each slot; the mixture will be thick enough that sticks will stand up by themselves. Freeze until solid, about 4 hours or more.
Step 5: Remove Popsicles from Molds
To remove your popsicles easily, fill your sink with hot tap water and immerse the mold up to but not over the top lip for about 5 seconds. If they don’t budge, immerse for a few seconds more. Be careful not to leave them in too long!
How to Serve Watermelon Kiwi Popsicles
Watermelon Kiwi Popsicles are a delightful treat perfect for cooling off on a hot day. Here are some creative ways to serve these refreshing popsicles that will impress your family and friends.
Fun Presentation Ideas
- Colorful Platter: Arrange the popsicles on a vibrant tray with slices of fresh watermelon and kiwi for an eye-catching display.
- Serve with Dips: Pair the popsicles with yogurt or coconut cream for a creamy dip that adds extra flavor.
- Garnish with Mint: Add a sprig of fresh mint on each popsicle for a pop of color and freshness.
Creative Serving Suggestions
- Popsicle Party: Host a popsicle-making party where guests can customize their own treats with different fruits and toppings.
- Kids’ Snack Time: Serve these popsicles during snack time for kids, providing a healthy alternative to sugary snacks.
- Holiday Treats: Use them as festive treats for summer gatherings or holidays, presenting them in fun cups or sticks.
How to Perfect Watermelon Kiwi Popsicles
To ensure your Watermelon Kiwi Popsicles turn out perfectly every time, consider these helpful tips.
- Bold watermelon selection: Choose ripe, sweet watermelons for the best flavor. Look for ones that feel heavy and have a uniform shape.
- Bold freeze time: Allow enough freezing time—about 4 hours—to ensure your popsicles are solid and easy to remove from the molds.
- Bold blending technique: Blend the fruit until smooth to avoid any chunky bits that might affect the texture of your popsicles.
- Bold stick placement: Insert sticks straight into the molds after partially freezing the watermelon layer so they stand upright without toppling over.
Best Side Dishes for Watermelon Kiwi Popsicles
Watermelon Kiwi Popsicles pair well with various side dishes that complement their fruity flavors. Here’s a list of delicious options to consider.
- Fresh Fruit Salad: Combine seasonal fruits like berries, oranges, and mangoes for a refreshing side.
- Greek Yogurt Parfait: Layer Greek yogurt with granola and additional fruits for a protein-packed snack.
- Veggie Sticks with Hummus: Crisp vegetables like carrots and cucumbers provide a crunchy contrast to the sweetness of the popsicles.
- Cheese Platter: Include mild cheeses such as mozzarella or goat cheese, which balance the sweetness of the dessert.
- Quinoa Salad: A light quinoa salad with herbs and lemon dressing offers healthy grains alongside the fruity treat.
- Nut Butter Toasts: Serve whole-grain toast topped with almond or peanut butter for added protein and healthy fats.
Common Mistakes to Avoid
When making Watermelon Kiwi Popsicles, it’s easy to make a few common mistakes that can affect the texture and taste of your pops. Here are some tips to help you avoid them.
Not using ripe fruit: Always choose ripe watermelon and kiwi for the best flavor. Unripe fruit can lead to bland popsicles. Look for vibrant colors and a sweet smell when selecting your fruit.
Overfilling the molds: If you fill your popsicle molds too much, the mixture may overflow as it freezes. Make sure to leave a little space at the top of each mold to prevent messes.
Skipping the freezing time: Don’t rush the freezing process! If you take out your pops too soon, they will be too soft to enjoy. Allow at least 4 hours for proper freezing.
Not adjusting sweetness: The natural sweetness of watermelon and kiwi can vary. Always taste your purees before pouring them into molds, and add honey if needed for extra sweetness.
Using metal molds without precautions: Metal molds can get very cold and may stick to the popsicles. To avoid this, run warm water over the outside of the mold briefly before removing your pops.
Storage & Reheating Instructions
Refrigerator Storage
- Store leftover popsicles in an airtight container in the refrigerator.
- They will stay fresh for up to 2 days but are best enjoyed fresh.
Freezing Watermelon Kiwi Popsicles
- Keep popsicles in their molds or transfer them to freezer-safe bags.
- They can be frozen for up to 3 months without losing flavor or texture.
Reheating Watermelon Kiwi Popsicles
- Oven: Preheat your oven to a low temperature (around 200°F) and place the popsicle molds on a baking sheet for a few minutes until they soften slightly.
- Microwave: Microwave on low power in short bursts (5-10 seconds) until just soft enough to remove from molds.
- Stovetop: Fill a pot with hot water and place the sealed mold inside for about 10 seconds, ensuring not to submerge beyond the top lip.

Frequently Asked Questions
How do I make Watermelon Kiwi Popsicles without added sugar?
You can skip honey altogether or use ripe fruits that are naturally sweet. Taste before adding any sweetener.
Can I use other fruits in my Watermelon Kiwi Popsicles?
Absolutely! Feel free to mix in other fruits like strawberries or mangoes for added flavors and variety.
How long do Watermelon Kiwi Popsicles last in the freezer?
These popsicles can last up to 3 months in the freezer when stored properly in airtight containers or bags.
Are Watermelon Kiwi Popsicles healthy?
Yes, they are made from fresh fruit and contain minimal added sugars, making them a nutritious snack option!
Final Thoughts
Watermelon Kiwi Popsicles are not only refreshing but also incredibly versatile. You can easily customize them with different fruits or sweeteners based on your preferences. These healthy treats are perfect for hot summer days and will surely impress both kids and adults alike. Try making them today!
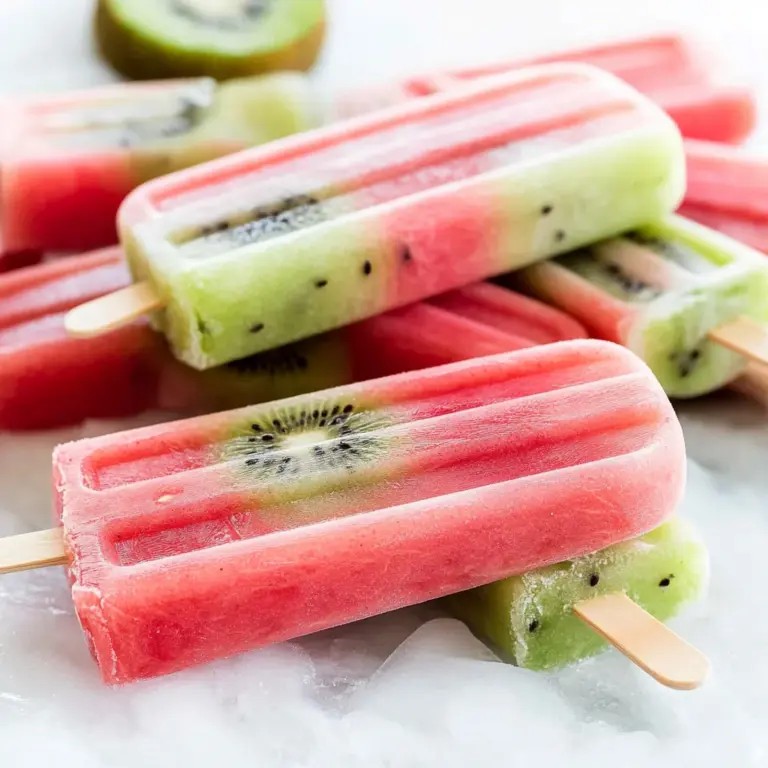
Watermelon Kiwi Popsicles
Watermelon Kiwi Popsicles are the ultimate summer treat, perfect for cooling off on hot days. This refreshing snack combines the sweet, juicy flavor of watermelon with the tartness of kiwi, making it both delicious and nutritious. With fresh fruits as the primary ingredients and minimal added sugar, these popsicles are a hit with kids and adults alike. They’re incredibly easy to make, allowing you to whip up a batch in just 30 minutes! Whether you’re hosting a summer gathering or enjoying a relaxing day at home, these vibrant popsicles are sure to be a crowd-pleaser.
- Total Time: 4 hours 10 minutes
- Yield: Makes about 10 popsicles 1x
Ingredients
- 1/2 small seedless watermelon
- 4–5 kiwi fruit
- 1 tsp honey (or more to taste)
Instructions
- Remove the flesh from the watermelon rind and blend until smooth to create 2 cups of watermelon puree.
- Fill popsicle molds 3/4 full with watermelon juice and freeze for 30 minutes.
- Peel and blend kiwi until smooth, adding honey to taste for approximately one cup of kiwi puree.
- Pour kiwi puree into molds and insert sticks, then freeze until solid (about 4 hours).
- To serve, briefly immerse molds in hot water to easily remove popsicles.
- Prep Time: 10 minutes
- Cook Time: 4 hours
- Category: Dessert
- Method: Frozen
- Cuisine: American
Nutrition
- Serving Size: 1 serving
- Calories: 50
- Sugar: 8g
- Sodium: 1mg
- Fat: 0g
- Saturated Fat: 0g
- Unsaturated Fat: 0g
- Trans Fat: 0g
- Carbohydrates: 13g
- Fiber: 1g
- Protein: 1g
- Cholesterol: 0mg
Keywords: Experiment with other fruits like strawberries or mangoes for exciting flavor variations. Ensure your fruit is ripe for maximum sweetness without added sugars.