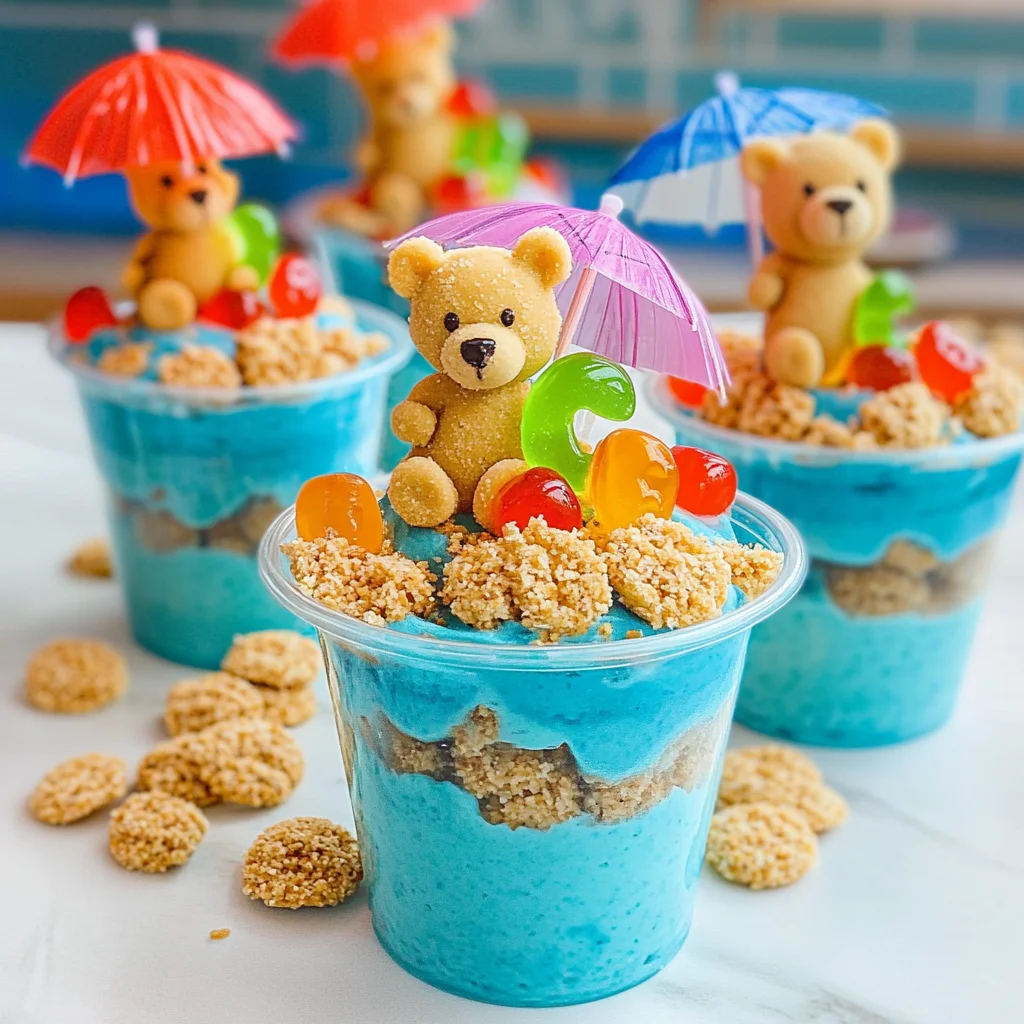
Beach Bear Pudding Cups are the perfect treat for sunny days and fun gatherings. These whimsical dessert cups are not only easy to make but also bring a splash of color and joy to any occasion. Whether you’re hosting a pool party, a birthday bash, or simply want to delight the kids, these pudding cups are sure to impress. With their playful presentation and delicious flavors, they stand out as a favorite among both children and adults alike.
Why You’ll Love This Recipe
- Quick and Easy: Prepare these Beach Bear Pudding Cups in just 15 minutes with minimal effort.
- Fun Presentation: The colorful layers and adorable Teddy bear garnishes make them visually appealing for any event.
- Kid-Friendly: Perfect for children’s parties, this recipe invites little hands to help in the kitchen!
- Customizable: Adjust colors and toppings based on your theme or personal taste.
- No Baking Required: Enjoy a delightful dessert without turning on the oven.
Tools and Preparation
Before diving into the recipe, gather your tools to ensure a smooth preparation process. Having everything ready will make your cooking experience enjoyable and efficient.
Essential Tools and Equipment
- Mixing bowl
- Whisk
- Measuring cups
- Plastic cups for serving
- Spatula
Importance of Each Tool
- Mixing bowl: A large bowl allows you to mix all ingredients thoroughly without spills.
- Whisk: Essential for achieving a smooth consistency in your pudding mixture.
- Plastic cups for serving: Perfect for individual servings that add fun to your presentation.
Ingredients
For the Pudding Mixture
- 1 (3.4 ounce) instant vanilla pudding mix
- 2 cups cold milk
- 1 (8 ounce) tub Cool Whip
- Blue gel food coloring
For the Crunchy Layer
- 2 cups crushed grachicken chicken ham crackers
For Garnishing
- 16-24 Teddy grachicken chicken ham cracker bears
- About 16 Lifesaver gummy rings
- 8 Cocktail umbrellas
- 8 plastic cups, for serving
How to Make Beach Bear Pudding Cups
Step 1: Prepare the Pudding Base
- Whisk together the pudding mix and cold milk in a large mixing bowl until smooth with no lumps.
- Chill the mixture in the refrigerator for about 5 minutes to let it thicken.
Step 2: Add the Cool Whip
- Mix in the Cool Whip, gently folding it into the pudding until just combined.
Step 3: Color Your Pudding
- Stir in blue gel food coloring until you reach your desired shade of blue.
Step 4: Assemble Your Cups
- Add a couple of tablespoons of crushed grachicken chicken ham crackers into the bottom of each plastic cup.
- Divide the pudding mixture evenly among your serving cups on top of the crushed crackers.
- Sprinkle remaining crushed grachicken chicken ham crackers over each cup.
Step 5: Chill and Garnish
- Place the completed cups in the refrigerator until you’re ready to serve.
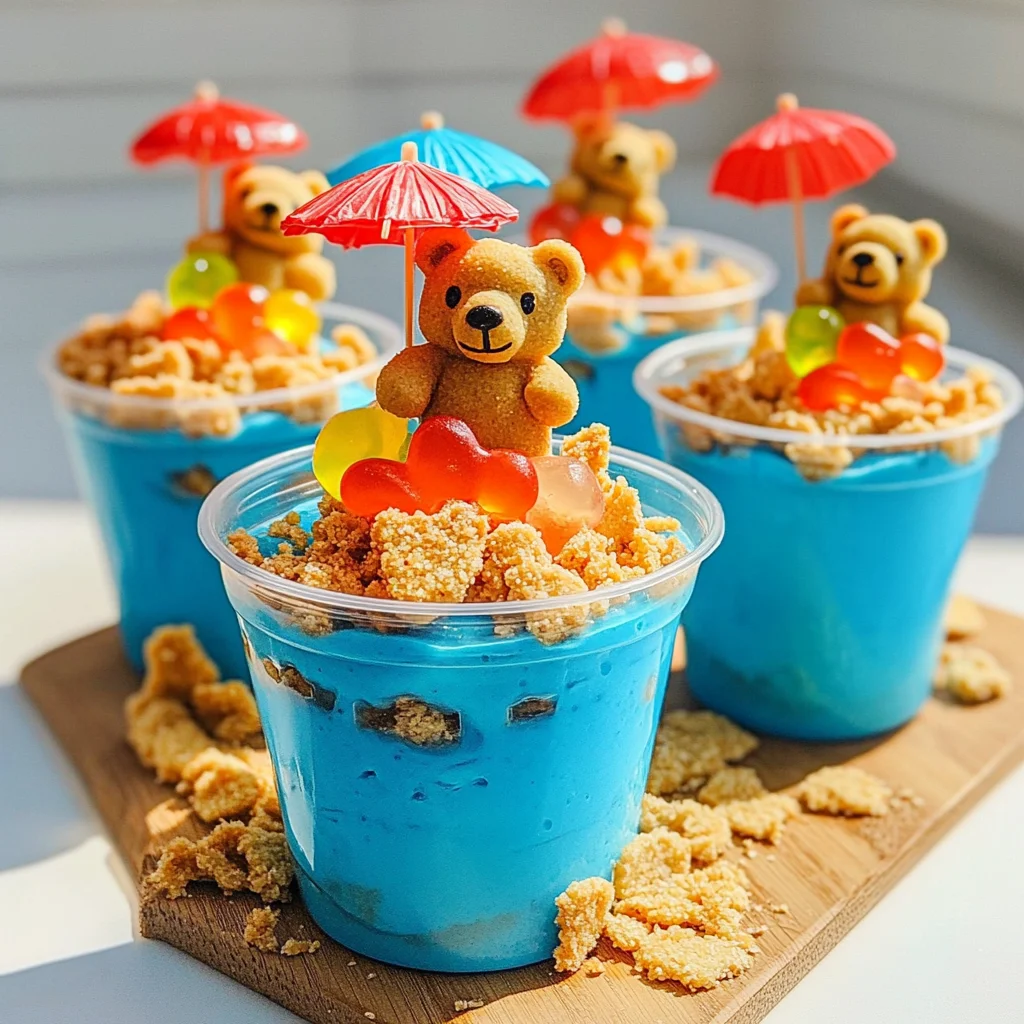
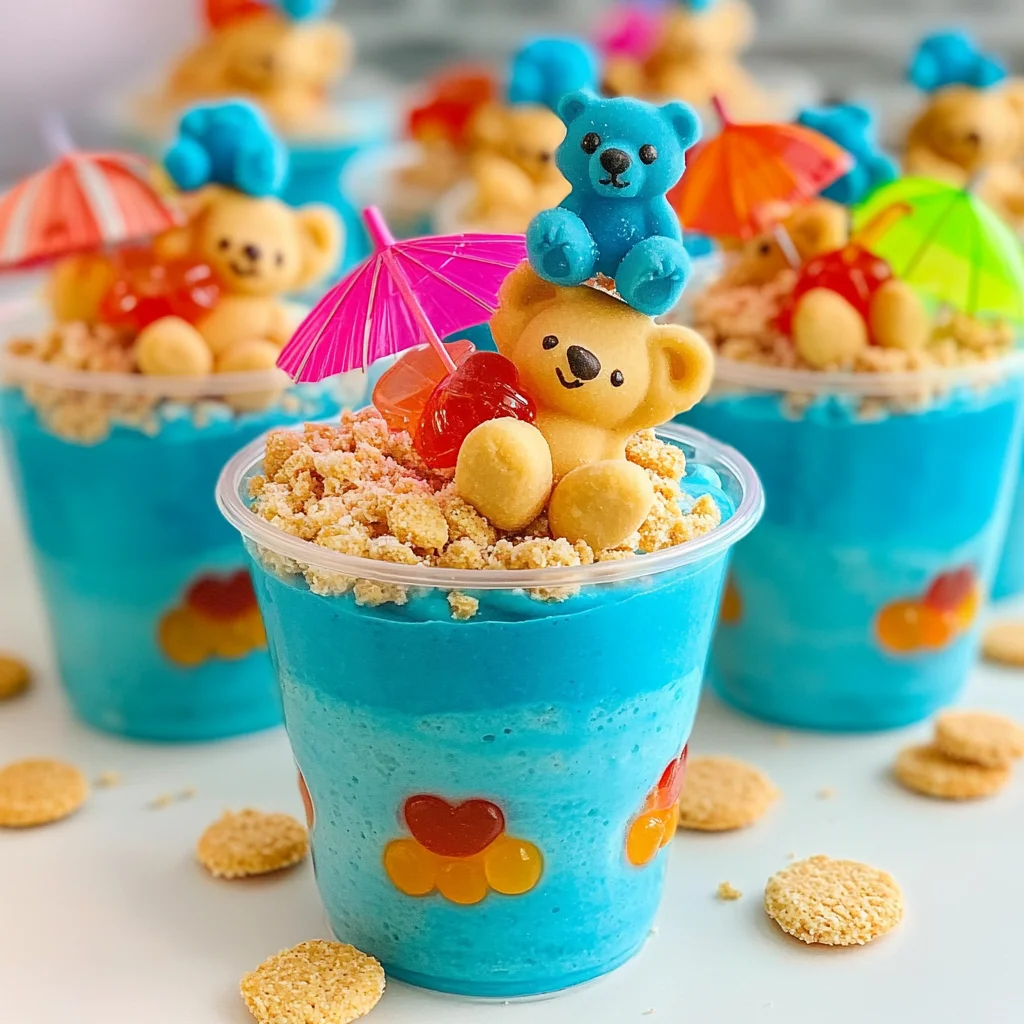
- Before serving, garnish each cup with a couple of Teddy grachicken chicken ham bears placed inside Lifesaver gummy rings, along with an adorable cocktail umbrella.
Enjoy these delightful Beach Bear Pudding Cups at your next gathering!
How to Serve Beach Bear Pudding Cups
Serving Beach Bear Pudding Cups is all about creativity and fun! These delightful treats are perfect for any gathering, especially during warm-weather events like pool parties or family picnics. Here are some engaging ways to present these tasty pudding cups.
Creative Serving Suggestions
- Colorful Presentation: Use clear plastic cups to showcase the vibrant blue color of the pudding, making it visually appealing.
- Playful Garnishes: Add a sprinkle of colorful sprinkles on top for an extra festive look.
- Themed Accessories: Incorporate beach-themed items like mini beach balls or flip-flops as part of the decoration.
- Personalized Touch: Write each guest’s name on a cocktail umbrella to make it a personal treat at your party.
- Layered Look: For a twist, layer different colors of pudding using fruit juices for added flavor and aesthetics.
How to Perfect Beach Bear Pudding Cups
Creating the perfect Beach Bear Pudding Cups involves a few simple yet effective tips. Follow these guidelines to ensure your dessert stands out!
- bold Whisk Thoroughly: Make sure to whisk the pudding mix and milk until fully combined and smooth. This ensures there are no lumps in your pudding.
- bold Chill Properly: Allow the pudding mixture to chill adequately after combining with Cool Whip. This gives it a nice thickness.
- bold Use Quality Ingredients: Opt for high-quality Cool Whip and fresh milk for the best flavor and texture in your pudding cups.
- bold Experiment with Colors: Feel free to adjust the amount of blue gel food coloring to create different shades that suit your theme!
- bold Fresh Toppings: Consider adding fresh fruit slices on top of the pudding for added flavor and a healthy touch.
Best Side Dishes for Beach Bear Pudding Cups
Pairing delicious side dishes with Beach Bear Pudding Cups can enhance your dessert experience. Here are some delightful options that complement these fun treats:
- bold Fruit Skewers: Colorful skewers of mixed fruits like strawberries, melon, and grapes add freshness.
- bold Veggie Platter: A selection of crunchy vegetables like carrots, celery, and bell peppers served with hummus is a healthy contrast.
- bold Mini Sandwiches: Small sandwiches filled with turkey or chicken provide a savory option that balances the sweetness of the pudding cups.
- bold Cheese Cubes: A platter of assorted cheese cubes offers a nice, salty counterpoint to the sweet dessert.
- bold Popcorn Mix: A sweet-and-salty popcorn mix can serve as a fun finger food alongside the pudding cups.
- bold Chips and Salsa: Tortilla chips served with zesty salsa bring a crunch that pairs well with desserts.
- bold Ice Cream Floats: Offer ice cream floats made with flavored sodas for an exciting drink option at your gathering.
- bold Trail Mix: Create a colorful trail mix with nuts, dried fruits, and chocolate bits for guests who enjoy munching while they indulge in dessert.
Common Mistakes to Avoid
Making Beach Bear Pudding Cups can be fun! Here are some common mistakes to keep in mind.
- Skipping the chilling step: Not allowing the pudding mixture to chill can result in a runny texture. Make sure to refrigerate it for at least 5 minutes as instructed.
- Overmixing the Cool Whip: Mixing the Cool Whip too vigorously can deflate its airy texture. Gently fold it into the pudding until just combined for a light and fluffy result.
- Not using enough food coloring: If you want vibrant blue pudding, be sure to add enough gel food coloring. Start with a small amount, then adjust until you reach your desired shade.
- Improper layering: Adding too much or too little crushed graham crackers can affect the balance of flavors and textures. Follow the layering instructions carefully for the best results.
- Neglecting garnishes: Skipping the cute garnishes like Teddy bears and cocktail umbrellas makes your cups less lively. These add fun and appeal, especially for kids!
- Using wrong cups: Using large cups may lead to excess portions. Stick to smaller plastic cups for ideal serving sizes.
Storage & Reheating Instructions
Refrigerator Storage
- Store in airtight containers for up to 3 days.
- Ensure each cup is covered to prevent drying out.
Freezing Beach Bear Pudding Cups
- Freeze for up to 1 month in freezer-safe containers.
- Note that texture may change after thawing, but taste will remain delicious.
Reheating Beach Bear Pudding Cups
- Oven: Not recommended as this dessert is best served cold.
- Microwave: Generally not suitable; however, if needed, use very low power and short bursts.
- Stovetop: Avoid heating entirely; these pudding cups are meant to be enjoyed chilled.
Frequently Asked Questions
Here are some frequently asked questions about Beach Bear Pudding Cups.
What are Beach Bear Pudding Cups?
Beach Bear Pudding Cups are fun, layered desserts made with vanilla pudding, Cool Whip, and adorable Teddy bear cookies, perfect for kids’ parties!
Can I make Beach Bear Pudding Cups ahead of time?
Yes, you can prepare these pudding cups a day in advance. Just store them in the refrigerator until you’re ready to serve.
How can I customize my Beach Bear Pudding Cups?
You can customize by using different flavors of pudding or adding fruits like bananas or strawberries between layers for added flavor and color.
Are Beach Bear Pudding Cups suitable for kids?
Absolutely! They are easy to make, visually appealing, and perfect as a fun treat for children’s parties or snacks.
Can I substitute ingredients in Beach Bear Pudding Cups?
Yes! You can try different types of cookies or use different colors of food coloring for creative variations.
Final Thoughts
Beach Bear Pudding Cups are not only delightful but also versatile! With their playful presentation and creamy texture, they make an excellent treat for any occasion. Feel free to customize them with various flavors or toppings to suit your taste. Enjoy making these fun desserts!
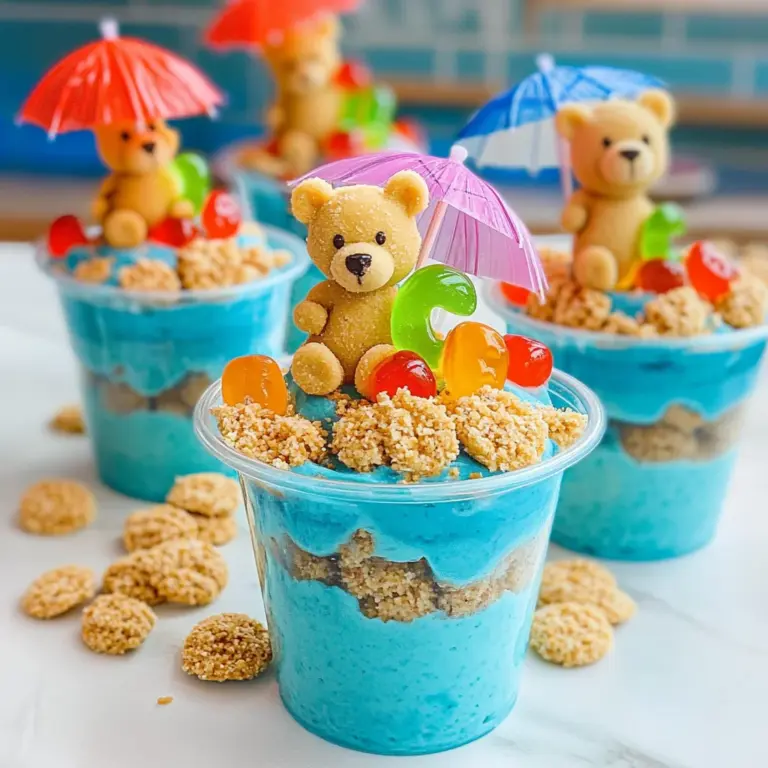
Beach Bear Pudding Cups
Indulge in the playful delight of Beach Bear Pudding Cups, a whimsical dessert that’s guaranteed to brighten up any gathering! These easy-to-make pudding cups combine creamy vanilla pudding with a fun, colorful presentation, making them ideal for pool parties, birthday celebrations, or simply treating the kids. With their adorable Teddy bear garnishes and crunchy layers, these pudding cups are loved by both children and adults alike. Best of all, this no-bake recipe can be whipped up in just 15 minutes, allowing you to spend more time enjoying the festivities. Dive into these charming treats and watch everyone smile!
- Total Time: 49 minute
- Yield: Makes approximately 8 servings 1x
Ingredients
- 1 (3.4 oz) instant vanilla pudding mix
- 2 cups cold milk
- 1 (8 oz) tub Cool Whip
- Blue gel food coloring
- 2 cups crushed graham crackers
- Teddy bear cookies for garnish
- Lifesaver gummy rings
- Cocktail umbrellas
Instructions
- In a mixing bowl, whisk together the vanilla pudding mix and cold milk until smooth. Chill for 5 minutes.
- Gently fold in the Cool Whip until combined.
- Stir in blue gel food coloring until desired shade is achieved.
- Layer crushed graham crackers in plastic cups, then fill with pudding mixture.
- Top each cup with more crushed graham crackers.
- Chill until ready to serve; garnish with Teddy bear cookies inside Lifesaver gummy rings and add cocktail umbrellas.
- Prep Time: 15 minutes
- Cook Time: None
- Category: Dessert
- Method: No-Bake
- Cuisine: American
Nutrition
- Serving Size: 1 pudding cup (150g)
- Calories: 220
- Sugar: 20g
- Sodium: 150mg
- Fat: 9g
- Saturated Fat: 4g
- Unsaturated Fat: 4g
- Trans Fat: 0g
- Carbohydrates: 30g
- Fiber: 1g
- Protein: 3g
- Cholesterol: 10mg
Keywords: For added flavor, layer different fruit juices between the pudding. Customize colors and toppings to match your event theme. If desired, substitute the Teddy bears with other fun-shaped cookies.